AI Doer Editor — User Guide
AI Doer Editor is a native, GPU-accelerated code editor (a fork of Lapce) with AI Doer's AI agent
built in as a first-class panel. It ships the AI engine
(getaibd-agent) inside the app, so there is nothing extra
to install to start chatting with the agent.
This guide covers everything you can do as a user.
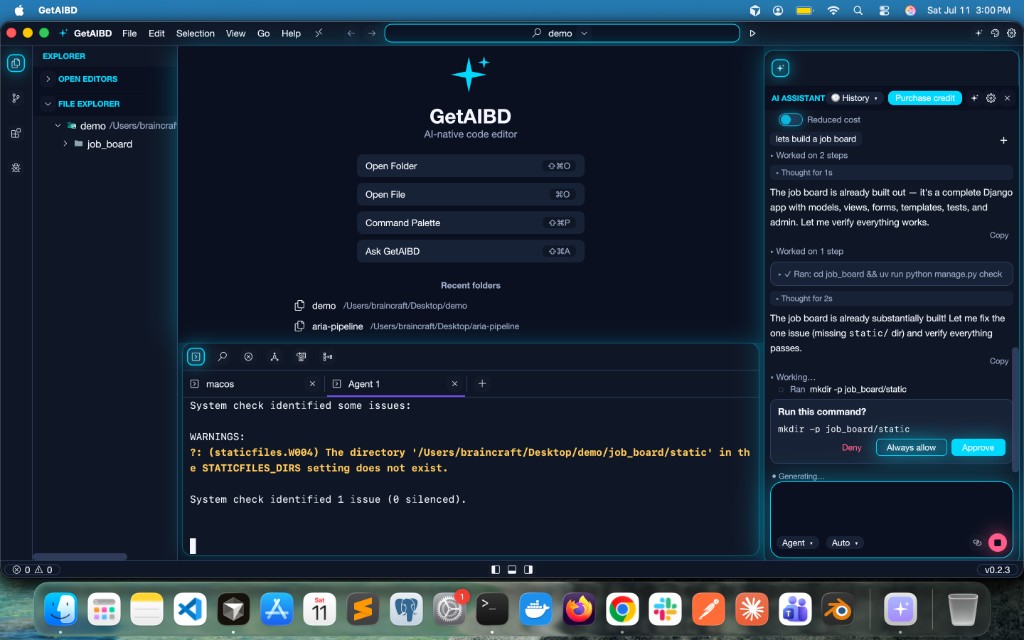
AI Doer Editor: activity bar, file explorer, editor tabs, and the AI Assistant panel on the right.
1. Installing
macOS (recommended)
One-line installer:
curl -fsSL https://getaibd.com/editor.sh | shThis detects your architecture (Apple Silicon aarch64 or
Intel x86_64), downloads the matching release archive,
installs GetAIBD.app into /Applications (or
~/Applications), and strips the quarantine attribute so it
opens without a Gatekeeper prompt.
You can also download the .tar.gz directly from the download
page, unpack it, and drag GetAIBD.app into
Applications.
Linux
Download GetAIBD-<target>.tar.gz from the Releases
page and extract it. Inside you'll find two executables that must stay
side by side:
GetAIBD/
├── getaibd          ← the editor
└── getaibd-agent    ← the bundled AI engine
Run ./GetAIBD/getaibd.
Windows
One-line installer, in PowerShell:
irm https://getaibd.com/editor.ps1 | iexThis checks the download against its published SHA-256, then runs the native installer: Start Menu entry, PATH, and an Add/Remove Programs entry. It is a per-machine install, so Windows asks for administrator rights.
Without administrator rights, set
$env:GETAIBD_EDITOR_PORTABLE=1 first and it unpacks
GetAIBD.exe + getaibd-agent.exe into your user
profile instead. You can also download the installer, an
.msi, or the portable .zip from the download
page — with the zip, keep both executables in the same folder and run
GetAIBD.exe.
2. First launch & the welcome screen
When you open AI Doer without a folder, you see the welcome screen:
- The AI Doer logo and product name.
- Quick actions — Open Folder (
⇧⌘O) and Ask AI Doer (⇧⌘A). - A list of up to 8 recent workspaces (click to reopen).
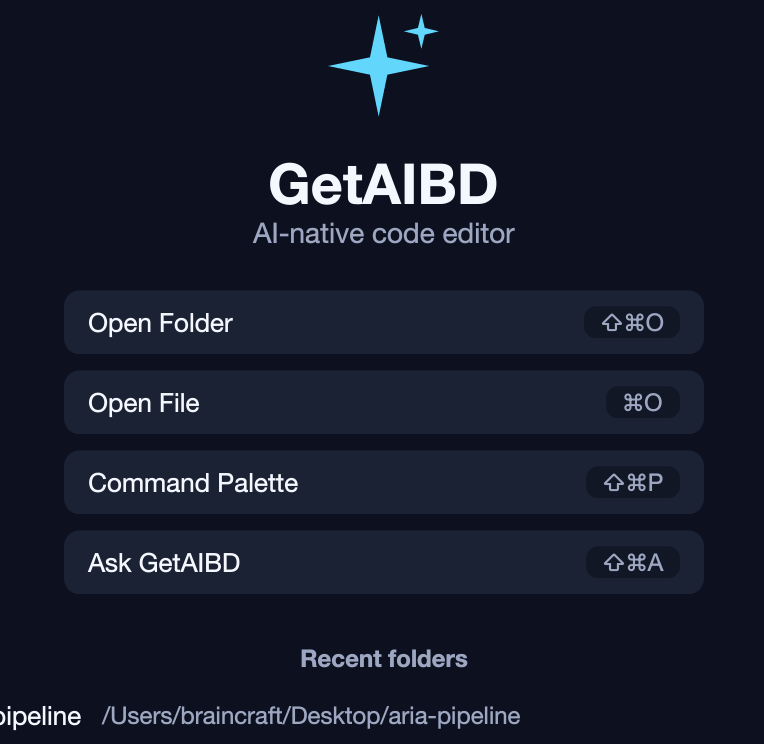
The AI Assistant panel is open on the right by default, ready to chat even before you open a project.
3. The layout at a glance
┌───────────────────────────────────────────────────────────────┐
│  Title bar: menus · logo · center command bar · theme · gear   │
├───┬───────────────────────────────────────────┬───────────────┤
│ A │                                            │               │
│ c │            Editor / diff area              │  AI Assistant │
│ t │            (tabs across the top)           │     panel     │
│ i │                                            │   (RightTop)  │
│ v ├────────────────────────────────────────────┤               │
│ a │  Terminal · Search · Problems (bottom dock)│               │
│ r │                                            │               │
├───┴────────────────────────────────────────────┴──────────────┤
│  Status bar: panel toggles · Git · language · disk · pills     │
└───────────────────────────────────────────────────────────────┘- Activity bar (far left): vertical icons that open panels — File Explorer, Source Control, Extensions, Debug. Icons can be dragged to reorder.
- Left dock: file explorer and related panels. Each open panel has a header showing its name.
- Bottom dock: Terminal, Search, Problems, Call Hierarchy, References, Implementation.
- Right dock: the AI Assistant panel (open by default, ~360 px wide).
- Status bar: click the left/bottom/right segments to toggle those docks; shows Git branch, language, and a Low disk warning when relevant.
Toggle the assistant panel focus anytime with ⇧⌘A
(macOS) / Ctrl+Shift+A.
4. Working with files
AI Doer is a full editor with the features you expect from a modern IDE:
- Open a file/folder: File menu, the welcome screen,
or
⇧⌘Oto open a folder. - Command Palette:
⇧⌘P— run any command by name. - Quick open:
⌘P— jump to a file by name. - Tabs: files open as tabs across the top of the editor area.
- Syntax highlighting via tree-sitter, LSP features (completion, diagnostics, go-to-definition) for supported languages.
- File explorer: an indented tree with VS Code-style colored file/folder icons. The selected file is highlighted with a chip that hugs its width.
- Drag a file from the explorer onto the AI panel to attach it to your next message (see §5.5).
5. The AI Assistant panel
The right-hand panel is where you talk to the AI Doer agent. The header shows AI ASSISTANT, a History button, a Purchase credit button, a New chat button, an API key (gear) button, and a Close button. Purchase credit opens ai-doer.com in your default browser. Below the header are your chat tabs, then the transcript, and at the bottom the composer with mode/model/reasoning controls.
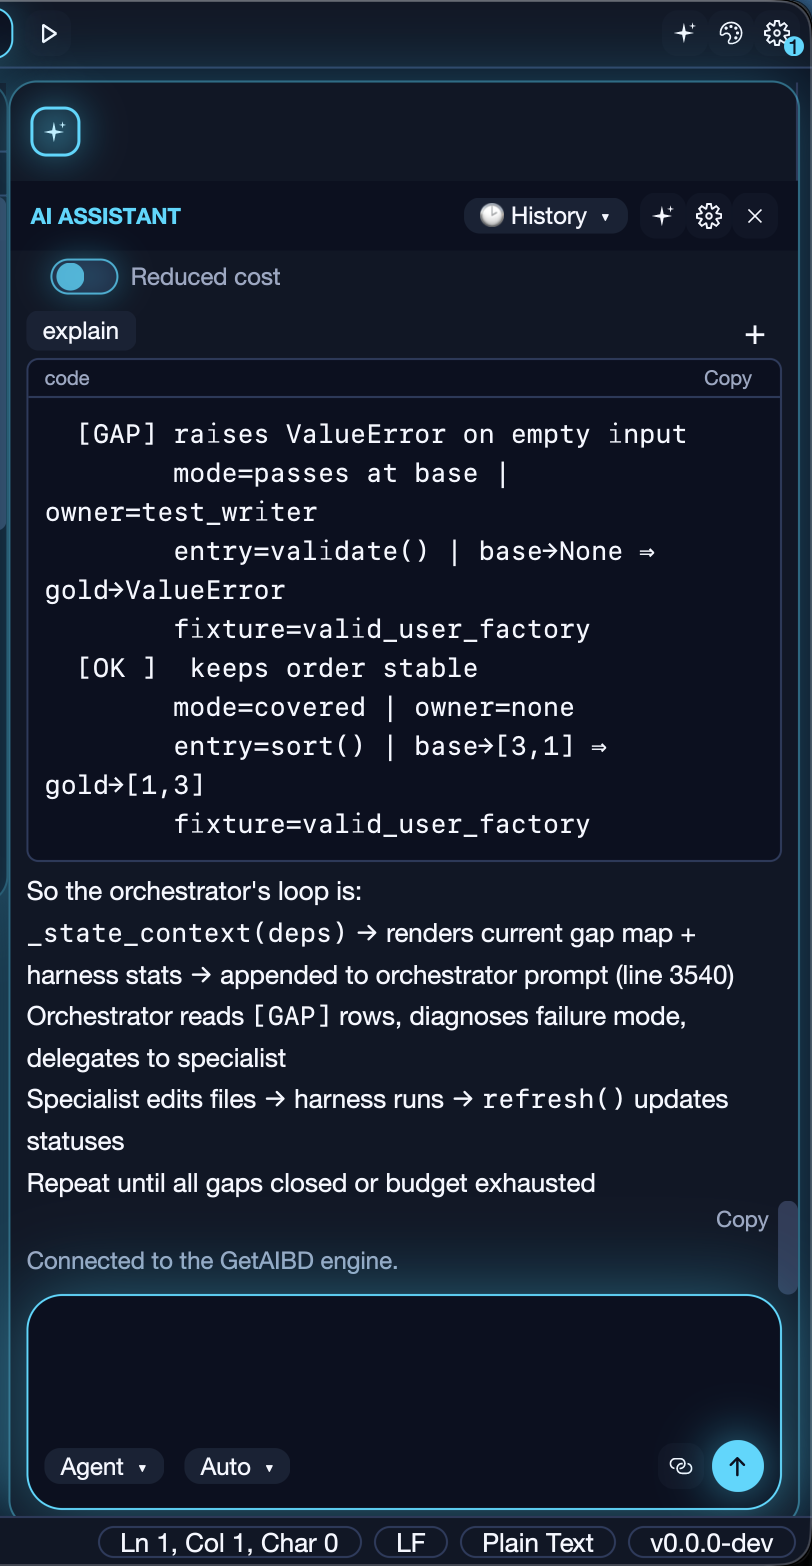
5.1 Modes (Agent · Plan · Ask · Debug · Reviewer)
Pick a mode from the dropdown in the composer footer. Each mode changes what the agent is allowed to do:
| Mode | What it does | Can edit files / run commands? |
|---|---|---|
| Agent (default) | Full agent: reads, edits, runs commands, completes tasks end-to-end. | Yes |
| Plan | Read-only. Explores the code, identifies gaps, and writes a plan (to a temporary markdown file). Great for "figure out how to do X" before touching anything. | No (read + plan only) |
| Ask | Answers questions about the code without changing anything. | No |
| Debug | Systematic troubleshooting with runtime evidence; can act like Agent to reproduce/fix. | Yes |
| Reviewer | Strict read-only code review. | No |
Plan mode never edits your files or runs shell commands — it produces a plan you can then hand to Agent mode.
5.2 Models & the free "Auto" tier
Open the model dropdown to pick a model. The picker:
- Pins Auto at the top — the free tier (backed by
qwen-flash). No API key required to start. - Groups the rest by provider: Anthropic, OpenAI, Google, xAI, DeepSeek, Qwen, Moonshot, Meta, Perplexity, Other.
- Shows a 🧠 next to models that support reasoning/thinking.
- Shows a 🔒 (disabled) next to premium models you can't use yet — i.e., when you're on the free tier without an API key. Add an API key to unlock them.
5.3 Reasoning effort
For models that support thinking, a reasoning dropdown appears with Low / Med / High. Higher effort lets the model think longer before answering (slower, often better on hard problems). The control is hidden for models that don't support it.
5.4 Sending messages & the follow-up queue
- Type in the composer and press Enter to send. Shift+Enter inserts a newline. The box grows as you type and scrolls once it hits its max height.
- While the agent is running, the send button becomes a Stop (■) button — click it to cancel the current run.
- If you type and send while a run is active, your message is queued and sent automatically when the current run finishes. Pressing Enter on a queued message sends it immediately, cancelling the active run.
5.5 Attaching files (@-mentions & drag-and-drop)
There are several ways to attach files so the agent focuses on them:
- @-mention: type
@followed by part of a filename. A picker appears with up to 8 matches; use ↑/↓ and Enter/Tab to accept. The file is attached. - Drag-and-drop: drag a file from the file explorer — or from Finder — onto the assistant panel.
- Attach (link) icon: click the paperclip/link icon in the composer footer to pick files with a native dialog.
Attached files show as chips above the composer (click × to remove one). When you send:
- The transcript shows your message with a 📎 filename1, filename2 tag — just the names, not the whole file content.
- Behind the scenes, the full content of each attached file travels with the message and stays the subject on follow-up questions, so you can ask "explain this" and then "now analyze the retry logic in it" without re-attaching.
- When you attach files, the agent uses them as the subject instead of whatever file happens to be open in the editor.
5.6 Thinking & tool cards
As the agent works, the transcript shows:
- A Thinking block that streams the model's reasoning, then collapses to "Thought for N s" once the answer begins. Click to expand.
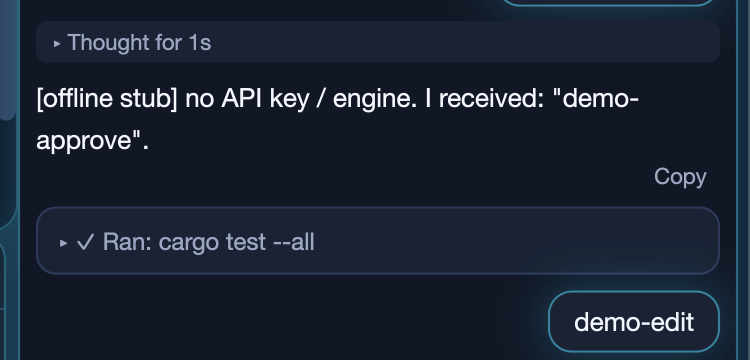
- Tool cards — rows like
Read <path>orRan <command>with a status (pending / done / failed). Once complete, they collapse to a compact "Worked on N steps" summary. Click to expand.
5.7 Command approvals
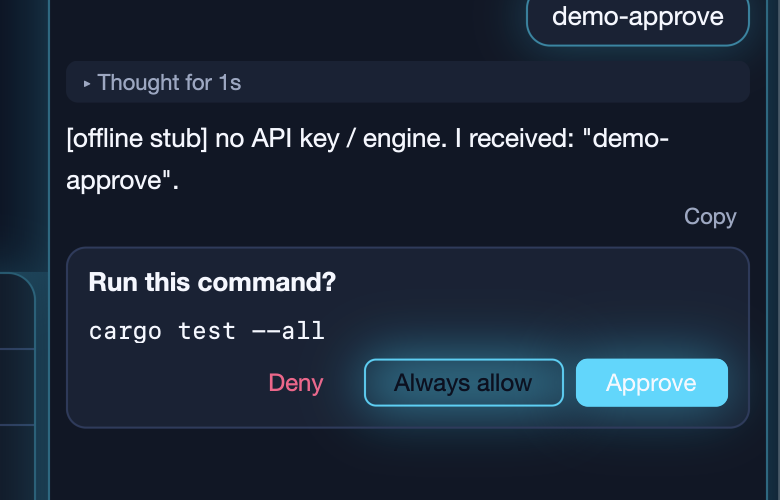
By default every run requires your approval before the agent runs a command or uses certain tools. When approval is needed, an inline approval card appears in the transcript with three buttons:
- Deny — refuse this command.
- Approve — allow it once.
- Always allow — auto-approve this tool for the rest of the session. Its high-contrast light label remains readable against the cyan action button.
Dangerous commands always re-prompt — even if you
chose "Always allow" — including things like sudo,
rm, curl, wget, ssh,
and raw shells. After you decide, the card collapses to a one-line
summary.
5.8 Reviewing agent edits (Keep / Reject)
When the agent edits or creates a file, AI Doer auto-opens a side-by-side diff (original on the left, new on the right). Each changed section (hunk) gets floating Keep and Reject buttons:
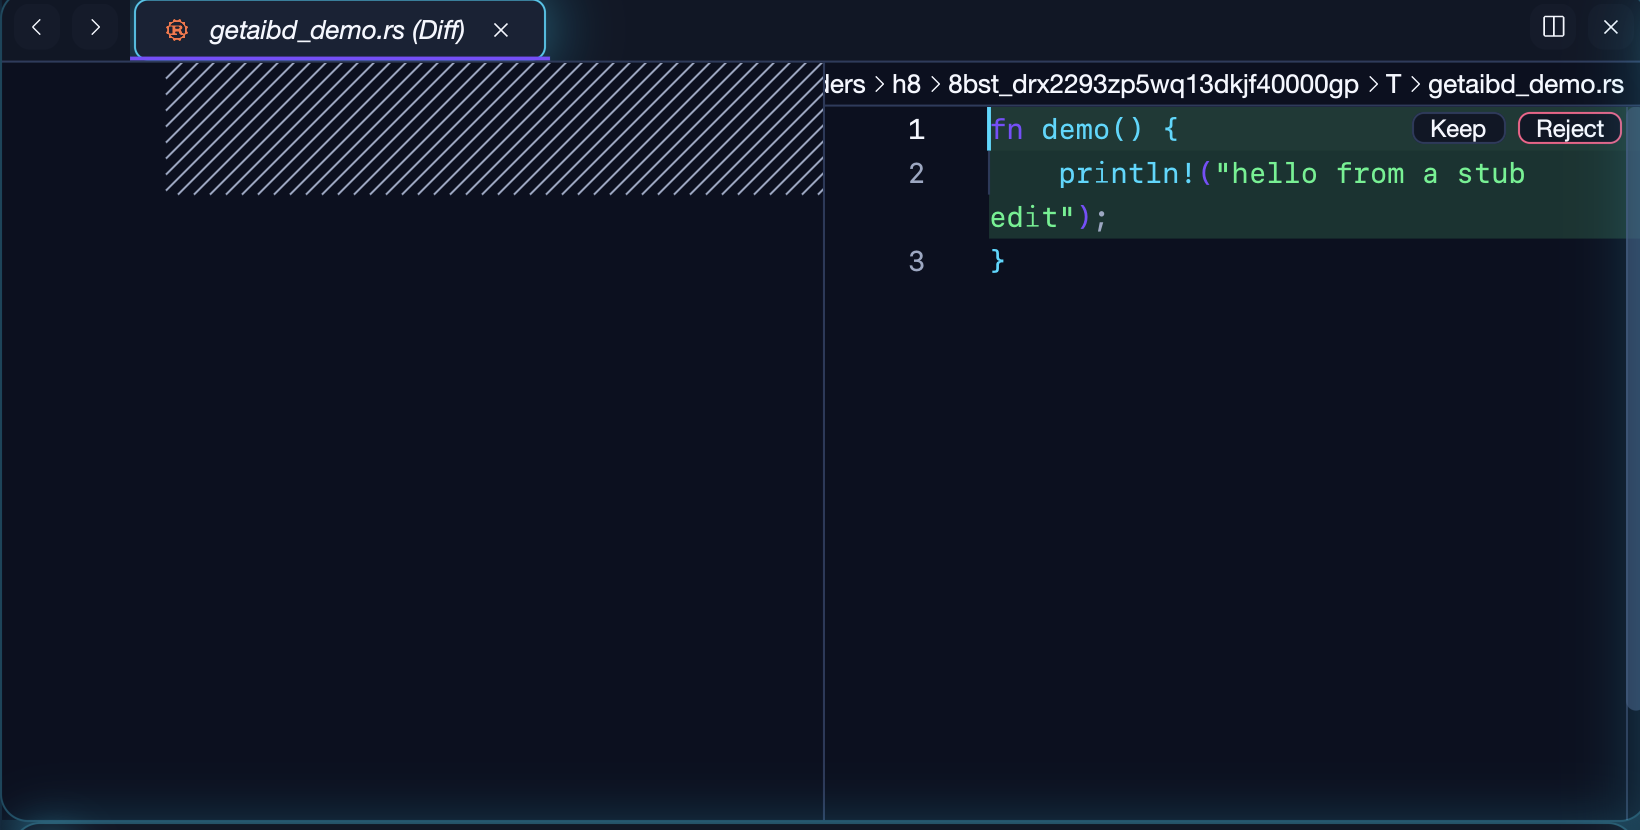
- Keep — accept that hunk (the change is already on disk).
- Reject — revert just that hunk back to the original. If rejecting empties a newly-created file, the file is deleted.
Once every hunk in a file is resolved, its diff tab closes automatically.
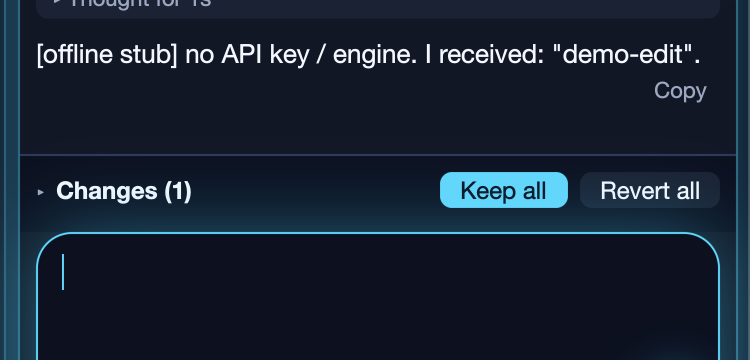
You can also manage changes from the Changes (N) section in the chat:
- Click any file row to open its review diff.
- Keep all — accept everything and close the review diffs.
- Revert all — restore originals (or delete new files) and close the diffs.
Opening the same file's review again focuses the existing diff tab instead of opening a duplicate.
5.9 Reduced cost toggle
A Reduced cost switch (in the slim controls row above the transcript) enables context compression, trimming the amount of conversation context sent to the model to save on token cost. Codebase RAG stays on regardless.
5.10 Chat tabs, history & persistence
- Multiple chat tabs: each tab is an independent conversation. Use the + button (or New chat) to start one. Tabs are hidden when only one exists.
- Persistence: conversations are saved per workspace, so they survive restarts. (Transient system notices like "Connected…" and streaming thinking/tool blocks are not persisted — just your messages, the answers, and errors.)
- Closing a tab archives it rather than deleting it. Click the History (🕑) button to see archived conversations and reopen any of them into a new tab. History holds up to 100 entries.
5.11 The free trial & API keys
- Auto (the free tier) works with no setup via an anonymous, device-bound token. The free Auto trial lasts 3 days from first use.
- When the trial ends, you'll see: "Quota exceeded — the free Auto trial has ended. Add an API key (gear icon) or pick another model to continue."
- Click the gear icon in the panel header to add your API key. With a key configured, Auto no longer expires and premium (🔒) models unlock.
- Click Purchase credit beside History to open ai-doer.com, where you can manage or purchase usage credit.
- The key is stored in
~/.getaibd/config.toml. You can update or remove it from the same modal; the engine restarts to pick up the change.
The trial is tied to a hardened device fingerprint persisted at
~/.getaibd/device_id, so a simple reinstall won't reset it.
6. The integrated terminal
- Open/focus the terminal with
Ctrl+``(backtick). - Full terminal with scrollback, a draggable scrollbar, mouse-wheel and trackpad scrolling, copy-on-select, and configurable profiles/fonts.
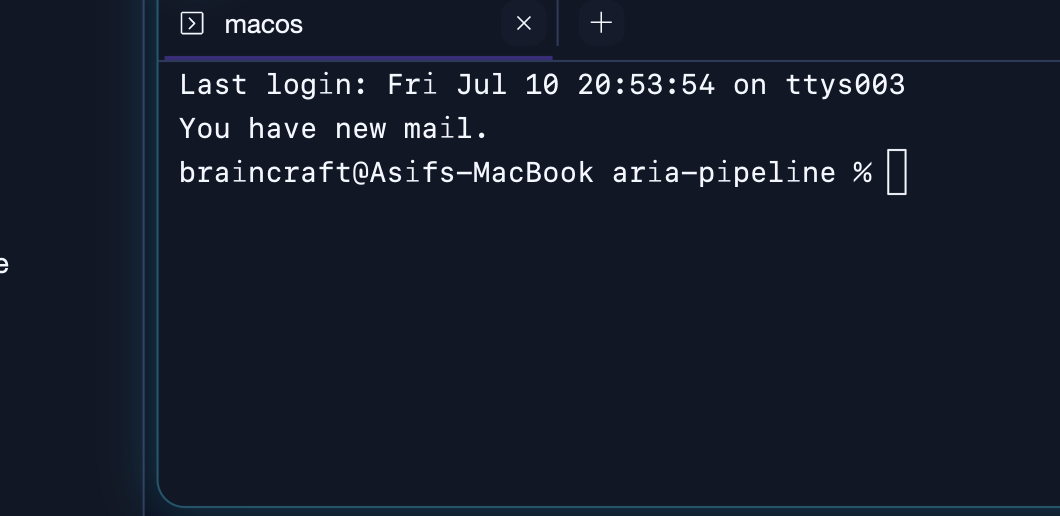
- Agent commands run in dedicated, visible Agent terminal tabs so you can watch exactly what the agent runs. Long-running / dev-server commands are detached to the background so the agent doesn't appear to stall.
- If the agent auto-opened the terminal panel to run something, the panel auto-hides when the command finishes (a terminal you opened yourself stays open).
The collapsible command output you see for agent commands lives in the chat's tool cards (see §5.6).
7. Source control (Git)
The Source Control panel gives you a full Git workflow in one place:
- Separate Staged Changes and
Changes sections with per-file stage/unstage (hover
+/−), plus stage-all / unstage-all. - The current branch (click to switch or create), and Publish Branch when there's no upstream.
- A collapsible Graph section rendering real commit history (lanes, branch/ tag/HEAD chips, author, short SHA, relative time), auto-refreshing on commits, checkouts, and branch changes.
- Click a changed file to see its staged-vs-unstaged diff.
8. Themes (Glow · Dim · Light)
AI Doer ships three themes:
- Glow — the "AI Doer Aurora" neon-cyber dark theme (default).
- Dim — a more restrained dark theme with subdued accents.
- Light — a soft, slightly gray light theme.
Toggle between them with the theme icon in the title bar, right next to the settings gear. Each click cycles Glow → Dim → Light → Glow, and your choice is saved. You can also pick a theme from the Command Palette.
9. Multiple windows & recent folders
AI Doer is fully multi-window, and opening a folder never kills a running window:
- New Window:
⇧⌘N(macOS) /Ctrl+Shift+N. - New Window Tab:
⇧⌘T/Ctrl+Shift+T. - Open Folder:
⇧⌘O/Ctrl+Shift+O.
When you open a folder:
- If that folder is already open in another window, AI Doer focuses that window (keeping its agent, terminals, and chat alive) instead of opening a duplicate.
- If your current window is empty (welcome screen), the folder opens in place.
- Otherwise it opens in a new window, leaving your current work running.
Open Recent is available in the File menu (up to 10 recent local folders, most recent nearest). On macOS, right-clicking the Dock icon also shows recent folders (when enabled).
Every window keeps its own agent and stays fully active, no matter how many you open.
10. Settings & keybindings
Opening settings
| Action | macOS | Command |
|---|---|---|
| Settings | ⌘, |
open_settings |
| Keyboard Shortcuts | ⌘K ⌘S |
open_keyboard_shortcuts |
You can also reach settings from the title-bar gear menu or the app menu (AI Doer → Settings…). The settings UI has sections for Core, Editor, UI, and Terminal, plus any plugin settings.
Handy
keybindings (macOS; use Ctrl/Alt equivalents
elsewhere)
| Key | Action |
|---|---|
⌘P |
Quick open file |
⇧⌘P |
Command Palette |
⇧⌘A |
Toggle AI Assistant focus |
Ctrl+` |
Toggle terminal focus |
⇧⌘O |
Open folder |
⇧⌘N |
New window |
⇧⌘T |
New window tab |
⌘, |
Settings |
Notable settings
core.color-theme— active theme (also set by the theme toggle).core.custom-titlebar— custom title bar (on by default).editor.diff-context-lines— context lines shown around diff hunks (default 3).editor.enable-inline-completion— inline completion (on by default).ui.border-radius— global corner rounding (default 10).terminal.*— fonts, profiles, shell integration, copy-on-select, etc.
Environment variables (advanced)
| Variable | Purpose |
|---|---|
GETAIBD_API_KEY |
API key (alternative to the gear-icon modal). |
GETAIBD_BASE_URL |
API base URL (default https://getaibd.com/v1/api). |
GETAIBD_AGENT_PATH |
Override the path to the getaibd-agent binary. |
GETAIBD_MIN_FREE_DISK_MB |
Low-disk warning threshold (default 1024 MiB). |
11. Low-disk-space behavior
AI Doer monitors free disk space on your workspace volume (every ~30
s). When free space drops below the threshold (~1 GiB, configurable via
GETAIBD_MIN_FREE_DISK_MB):
- A red "Low disk: N MB" pill appears in the status bar.
- A one-time warning toast is shown.
- Editing and the terminal keep working — the app does not hang.
- Background indexing is paused and the agent stops writing to its memory database until space is available, so you won't wedge the engine on a full disk.
12. Updating
On macOS, AI Doer checks for updates hourly against a published manifest. When a new version is available:
- A badge appears on the logo in the title bar.
- The title-bar menu shows "Restart to update (vX.Y.Z)".
Clicking it downloads the new version, verifies its SHA-256, replaces
GetAIBD.app, and relaunches.
On Linux/Windows, re-download the latest archive from the Releases page.
13. Where AI Doer keeps your data
| Path | What's there |
|---|---|
~/.getaibd/config.toml |
Your API key and settings. |
~/.getaibd/device_id |
Anonymous device fingerprint (for the free trial). |
~/.getaibd/editor-chats/ |
Saved chat sessions (per workspace). |
~/.getaibd/auto-trial-start |
Free-trial start marker. |
~/.getaibd/projects/<slug>/ |
Per-project agent memory/index DB. |
<your-project>/.getaibd/ |
Project-level agent config you author (see below). |
Your AI conversations are stored centrally under
~/.getaibd/ — they don't clutter your project folders.
Project-level agent config (optional)
Inside any project you can add a .getaibd/ folder to
guide the agent:
AGENTS.md— project-specific instructions/rules for the agent.rules/*.md— scoped rules (with globs / always-apply).permissions.json— allow/ask/deny policy for tools and commands.sandbox.json— opt-in OS sandboxing forrun_command.worktrees.json— per-worktree setup commands.mcp.json— external MCP servers to expose as tools.
The exact schemas are shared across the editor, CLI, and VS extension.
14. Troubleshooting
"getaibd-agent did not become healthy in time" / offline
stub. The bundled engine failed to start. Make sure you didn't
separate the editor binary from getaibd-agent (on
Linux/Windows they must stay side by side; on macOS the agent lives
inside GetAIBD.app/Contents/Resources/bin/). You can point
the editor at a specific agent binary with
GETAIBD_AGENT_PATH.
The agent seems to stop mid-task. Long-running / dev-server commands are intentionally moved to the background. Check the Agent terminal tab for live output. If a run genuinely stops early on a specific prompt, note the exact wording — the run loop has guards against loops and premature stops, and edge cases are fixed as they're reported.
Premium models show a lock (🔒). You're on the free tier. Add an API key via the gear icon to unlock them.
Free Auto stopped working after 3 days. That's the free-trial limit. Add an API key or switch to another model.
Chat history disappeared. Closing a tab archives it — open the History (🕑) button to restore it. Conversations are per workspace; make sure you opened the same folder.
The app warns about low disk. Free up space; indexing resumes automatically once you're above the threshold. Editing and the terminal keep working in the meantime.